Apple Custard Cake

Autumn is one of the most amazing times of year, in my opinion. You can literally smell it in the air. There’s a little chill, the wind picks up and makes the leaves dance, the kids head back to school, and best of all the local apples ripen!

I’ll eat a plain apple any time, day or night, but is there anything more delicious than an apple dessert?

My only complaint about apple desserts is that they tend to be really heavy in sugar. I’m not afraid to indulge my sweet tooth now and then, but I really don’t like to eat too much sugar or flour. I prefer creamy, rich desserts over sugary-sweet ones. Besides, when you add too much sugar it camouflages the natural sweetness of the apples. And really, that’s one of the most amazing things about apples. You can adjust the sweetness of your desserts by choosing different apple varieties. I have two apple trees in my yard, and this year one of them has been going absolutely bonkers. My apples are medium-sweet, so you might want to adjust this recipe if you are using a tart or super-sweet variety.


(If you’re wondering who the photographer is, my lovely oldest daughter has started an Instagram account for the blog! She is quite talented, so follow her at HomesteadFromTheGroundUp, and enjoy her pictures between blog posts!)

This apple cake recipe is my favorite way to make a baked apple dessert because it doesn’t go overboard. In fact, it uses only 1/2 cup of sugar and 1/2 cup of flour in the entire recipe!

I recently discovered silicone baking pans, and my life just hasn’t been the same since. I HATE the waste of single-use things like parchment paper, and I really don’t want to add additional calories to my food by heavily greasing pans, but I was also getting really tired of losing the bottom 1/3 of my cornbread muffins every time I made them. Finally, I broke down and ordered a set of silicone pans and muffin cups. If you haven’t tried them, I highly recommend it! The only drawback is that they aren’t very attractive, so they are not ideal for dishes that need to be served in their pans, like cobblers or shepherd’s pie.

IMG_4673

For this recipe you will need the following ingredients:

  • 4 Apples, peeled and cut
  • 1/2 cup All-purpose flour
  • 1/2 cup Sugar separated into two-1/4 cups
  • 1 Tablespoon Baking powder
  • 1/8 teaspoon Salt
  • 1/2 teaspoon Vanilla
  • 3 Eggs
  • 2 Tablespoons Oil
  • 1/3 cup Milk
  • 3 Tablespoons melted, cooled Butter
  • Spices (nutmeg, cinnamon, etc.)

IMG_4676

The apple cutting doesn’t have to be done in any particular fashion, but I have noticed that the finished cake does serve better when the apples are cubed instead of sliced. For this reason, I cut my apples into approximately 1/2 inch cubes. Homegrown apples brown insanely fast once they’re cut. It really makes you shudder when you realize how much junk they must pump into store-bought apples to keep them from browning. Ew!

IMG_4690

First, preheat your oven to 400 degrees F. Then, mix together all your flour, 1/4 cup of sugar, baking powder, salt, vanilla, 2 eggs, oil, and milk. You are going to wonder how in the world this is enough batter to become a cake. You are right; it isn’t going to be enough. It is going to be an amazing CUSTARD cake, though. Don’t expect this bad boy to turn out like a birthday cake. Just roll with it, though. You won’t be disappointed.


Pour your batter over your apple cubes and mix everything together. Throw everything into a baking pan and chuck it in the oven for 25 minutes.


While your custardy deliciousness is baking, mix together your remaining ingredients for the topping. You should have 1/4 cup of sugar, 1 egg, and 3 Tablespoons of melted, cooled butter left. If not, well, then, you were probably wondering what I meant when I said the batter wasn’t going to be enough. Don’t worry if you made that mistake. Your cake will still be fine.

IMG_4691
Isn’t my mini cast iron cauldron just adorable? It’s perfect for melting butter.

When the 25 minutes is up, pull your dish out of the oven, spread the topping all over it, and throw it back in for another 10 minutes. This is also your opportunity to add any of your preferred spices. I really like this dish when it is dusted with a little nutmeg, but you can use cinnamon, cloves, vanilla sugar, allspice, or whatever your heart desires.


Here is a really important step. When the 10 minutes are up and the cake is done, pull it out of the oven and LET IT REST FOR 10 MINUTES. You need to resist the urge to poke, prod, jiggle, wiggle, slice, lick, or sniff it for at least 10 minutes. The cake needs to set. If you’re concerned about the way it looks, just remember that I warned you not to expect a birthday cake. I promise you are fine. Unless you didn’t read the directions and mixed all the ingredients together. Then you’re screwed. Kidding.

Once you have rested your custard cake for at least 10 minutes go ahead and give it a taste. It’s rich and creamy with a hint of sweetness and a gorgeous apple flavor. I like to eat it with a small scoop of vanilla ice cream or drizzled with cream.


FullSizeRender

There is very little guilt factor with this dessert, too. If you cut it into six servings, each serving has 280 calories, 5 grams of protein, 4 grams of fiber, and under 30 grams of sugar. That’s not a horrible way to kill a sweet tooth. I hope you give this recipe a try. If you do, please let me know how it came out and any additions or changes you made. I love new inspiration!

Bon appétit.
400 Square Foot Vegetable Garden Layout

Lots of things need to be considered when planning a garden. Not only do you need to have adequate soil, water, and sun, but you have to plant things in just the right place. Some plants need lots of sun, but if you live in a very hot climate they can’t handle afternoon sun. Some plants need shade, but filtered shade, not complete shade. Some plants are just buttheads and need to be isolated or they’ll take over (I’m talking about you, mint). If you buy indeterminate tomatoes or vining cucumbers then not only do you have to consider how you will support them as they climb, but you also have to place them in an area where they won’t grow up and shade nearby plants. Basically, it’s not a simple process. But fortunately, it’s not an impossible process either.

This is my first time doing honest-to-goodness, in-the-ground vegetable growing. I can grow some killer peppers and tomatoes in containers, and my herbs have done alright over the years. But I’ve never done a vegetable garden where the plants go straight in the ground. The side-effect of being a renter for so many years, I guess. So I have to plan this all out from the beginning. Time to pull out the stuff I learned in all those botany classes.

We started with a garden plan borrowed from the back of Small Plot High Yield Gardening called the 400-Square-Foot Soup Garden. This garden plan has a great selection of vegetables for cooking, like beets, beans, broccoli, potatoes, celery, carrots, onions, etc. Originally we were going to follow this plan almost to a T, until we spoke to Dax at Beets Workin’ Farm. He basically warned us against spending much time and energy trying to grow celery and carrots. Ok, so we scratched those two things off the list. We also wanted to swap spinach out for lettuce, since we eat a lot more lettuce, and decided to do more lettuce instead of peas. Did I mention we eat a lot of lettuce? We also swapped out sorrel and parsley for lots of hot peppers. The Handyman loves hot sauce, and makes a few types of his own, so we wanted to make sure we had plenty of hot peppers to use. So, basically we kept the layout of the rows along with the herb garden in the center of the path, but the varieties we planted are quite different so we had to reassess where to place everything.

Beets, which are a family favorite, do extremely well when planted next to bush beans and potatoes but far away from pole beans. Cucumbers like being next to cabbage and broccoli. Eggplant likes peppers. Peppers like tomatoes. Tomatoes like peppers, but shouldn’t be next to potatoes, because they both attract the same pests. And pretty much everything in the garden benefits from having marigolds around. Marigolds repel pests, and the chickens can eat the spent blossoms to enrich the color of their egg yolks.

So, after a lot of drawing, erasing, re-drawing, crumpling, muttering, and grumbling, I finally came up with a layout that will keep things apart that need to be apart, keep things near that like to be near, keep things east that grow quite tall, and protect things that are more sensitive. My lettuce is currently set to get strong afternoon sun, but I am planning on making shade cloth tents for those three rows, so hopefully I can still grow it there.

And then we planted everything! That was the best part. I love sinking my hands in the soil.

garden labeled

box labeled

It was Mother’s Day this past weekend, and my kids knew exactly what to make for me. Garden markers! The Handyman cut them some pieces of wood, and my oldest daughter helped orchestrate a painting party for everyone to make some signs. I love homemade things, and I especially love mis-matchy things. If things look too neat and orderly I start to get a little claustrophobic. I like an eclectic look. These lovely signs are a perfect addition to our garden and a great visual representation of the unique personalities each of my kids have.


In addition to the things we started from seed, we purchased the following seedlings from our local nursery:

  • hot peppers
  • bell peppers
  • cucumbers
  • zucchini
  • eggplant
  • purple cabbage
  • lettuce
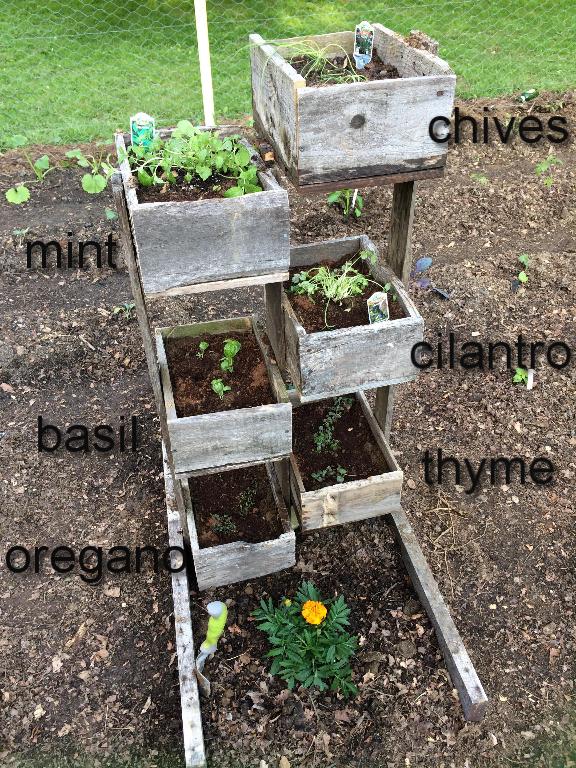
  • mint
  • chives

The reason we purchased some things instead of growing them was purely a financial decision. We knew we wanted a lot of variety in our hot peppers, so to buy 6-7 different seed packets only to grow 1-2 plants of each variety just doesn’t make sense. We also knew we only wanted one or two zucchini and eggplant plants. When seed packets are a few dollars a piece, and your local nursery sells seedlings at 50 cents a piece, the math isn’t difficult to do. I also ended up buying two purple cabbage seedlings on impulse, because I remembered how much I love the spicy addition to my salads. Finally, my mint and chive seeds never germinated. Still not sure why.

IMG_0652
Sad mint and chives are sad

One thing I was trying to avoid, too, by buying some things and starting others, was having everything ready for harvest at the exact same time. The bush beans, for example, all ripen together. So if I plant 15 bean seedlings in my garden at the same time then I will have ten thousand beans at once. However, bean seeds only have about a 70% germination rate, and a germination period of about 10-14 days. So, I plant my seeds, two weeks later I plant more where the bald spots are, and now I have naturally staggered bean plants. Same with the lettuce. I bought green leaf lettuce that can be harvested in bits or the whole head. As it matures, I will take outer leaves from some of the heads, allowing the inner leaves to keep growing and growing, and some I will head completely. Then I will replace those heads with lettuce seeds and start the process over again. This will also keep us from getting bored by letting us swap out lettuce varieties throughout the season. Haha … letting us … let us … lettuce. (Ok, I’m getting giddy, time for bed).

Here it is! The finished garden! (Well, technically the potatoes weren’t planted at the time this picture was taken, but close enough!)

A few things we learned through the seed-starting process will hopefully help us next year. First of all, we believe we need an additional grow light in the basement. We didn’t have anything get leggy or lean, but we do feel like we could have had a better arrangement downstairs if we had more light. I also didn’t thin my seedlings. It made me quite nervous to decide which seedling was going to live and which would become chicken food, and I was worried I would pick the wrong one. Then I had this wacky idea that I could just separate the seedlings right before planting and have double the plants. Well, that was stupid and I know that now. I was only successful in separating one of my seedling sets. The rest ended up getting thinned out anyway, only the plants were bigger so I felt even worse. Next year I will thin! I promise!

Another thing that will hopefully be different next year is the starting time. We were starting from scratch this year, and we had to wait for the ground to thaw enough for us to work the soil before we could do anything. Even the silage tarp couldn’t go on until we were able to take off the first layer of grass. Next year we can put cold-tolerant plants out much earlier than we could this year, because the garden will be ready. Also, we can plant garlic this fall and have garlic in the garden next spring! Lots of things can be started earlier. The Handyman wants to build us a cold frame, too, so hopefully we can extend our growing season in both directions. I am going to spend this winter doing the research to figure out how best to get two harvests out of this garden next year.


Starting Seeds Inside

So last night the Handyman and I put our new DIY Soil Block Maker to the test.

My last frost date is in mid to late April, so I needed to get some seeds started indoors. According to Brett Markham, author of The Mini-Farming Bible, some spring seedlings can be started indoors as early as 12 weeks before the last frost. This is good for cold-hardy plants like broccoli. Some only need about two weeks inside before going outside, so obviously we aren’t starting those yet. Sorry, watermelon, you’ll have to wait.

Round One consists of the following plants: img_9336

  • broccoli
  • cabbage
  • celery
  • yellow onions
  • red onions
  • chives
  • tomatoes
  • herbs
    • basil
    • mint
    • thyme
    • cilantro
    • oregano
    • parsley

I’ve mentioned before that I love the book Small- Plot, High-Yield Gardening. Well, this book has one of the best things for someone starting out: A complete garden plan for just about any size garden you could possibly want. There are a lot of things to consider when planning a garden. Did you know that some plants really don’t like to be neighbors? For example, planting onions near beans will actually stunt the growth of the beans (Burpee). And some plants provide protection for others, like garlic, which is pretty much your garden’s personal bodyguard. But honestly, the list of dos and don’ts is kind of overwhelming, especially for someone who is trying to flesh out other plans as well. I just want someone to give me a diagram of what I should plant and where I should plant it. Next year I’ll think about what I loved and what I hated and adjust accordingly. Well, that’s exactly what I found in the back of Small-Plot, High-Yield Gardening.

The Handyman and I figure we are going to aim for a 20’x20′ garden. We have the space, and when we do something we don’t mess around. However, we reserve the right to scale it back if we find it too intense for Year One. We did make a couple of minor changes to the plants within the garden, but we are essentially following the layout for the 400-Square-Foot Soup Garden found on page 231. Once we’ve started all our seeds and made those final decisions I will post a diagram of exactly what we’re planting. I can promise one thing, though… it will contain a lot of hot peppers. The Handyman is capable of making hot sauce that will burn your eyebrows off if you get too close.

Just to give you an idea of scale, however, for just the plants we are starting in Round One of seed starting indoors we have to do 236 soil blocks! So, we got to test out our soil block maker and really get the technique honed in.

First of all, we are using coconut hulls as seed starting medium. If you’d like to know why, check out my post on the DIY Soil Block Maker. Burpee makes a lovely compressed brick of organic coconut hulls for just under $3, and it’s available at Home Depot. We bought several with our spare change. Basically, you take this brick, put it in a bucket, add water, wait for it to expand, and then form the hulls into whatever shape you want. It expands to 8 liters, and we found that we were able to get about 70-80 blocks from one brick. For our seed starting project all we used was the coconut hulls, a large bucket we got from a friend’s restaurant, a small bucket for spillover, water, some leftover trays we never used from a barbecue last summer, and the block maker. Now, in case anyone is wondering…. yes, this is my kitchen island. And no, I don’t recommend that anyone use their kitchen islands for this project. Ever. Learn from my fail. This was after making the five you see pictured. Imagine what my kitchen looked like after over 200!

img_9746
Friends don’t let friends destroy their butcher block counter. For the love of gardening, please use a picnic table or at least put down a tablecloth.

Here is a short video demonstration of me using the soil block maker. I don’t have fancy camera equipment, but it should suffice.

Here are additional tips as well as the written tips for anyone who can’t access the video.

  • The directions call for 4 1/2 quarts of water.  We found that 4 1/4 quarts was just perfect. Too much water and the medium is soggy, too little and the blocks don’t hold their shape. The key is to add 4 quarts of water, let the brick expand, mix it thoroughly, drizzle the remaining cup of water around and thoroughly mix again, breaking up any clumps.
  • Hand fill the block maker with planting medium. Don’t pack it full. Imagine you’re filling a measuring cup with flour.
  • When pressing down on the plunger, don’t smash the heck out of it. It doesn’t take your whole weight to compress, and you don’t want to make the soil too dense for early roots to penetrate.
  • Don’t forget that when you pull up the PVC you don’t have any support on the block anymore, so stop pushing on the plunger before you pull up on the PVC.
  • The plastic disk really needs to go past the bottom of the PVC, so if it’s indented then you need to adjust the location of the disk on the carriage bolt (see pic below)


Now that we have blocks made, we have to add the seeds. I added three seeds per block, and I will thin them out later, once I can identify the single seedling that is the strongest of the three. According to Small-Plot, High-Yield Gardening, one of the biggest mistakes people make when starting seeds is burying them too deep or covering them too hard. They only need to be covered with a sprinkling of dirt equivalent to 3x the size of the seed. Look at the size of these mint seeds! They need a few crumbs of dirt on them, and that’s it.

img_9609

Here is an example of a soil block that has been planted with onion seeds and one that has not. See how loose the soil is covering the seeds? We don’t want the plant to have to work too hard before it gets those first leaves up and starts photosynthesizing.

planted


So, as I mentioned before in my shopping post, plants need growing medium, warmth, moisture, and light. Our seeds are going in the furnace room in my basement. It’s around 70-75 degrees in there. That’s perfect for new seeds. We put the blocks in repurposed trays that are water-tight, and we will mist them until the first leaves appear and then water from the bottom to help establish healthy roots. No spoiled plants here.

Now here’s the interesting thing I discovered. According to Brett Markham’s Mini-Farming Bible, fluorescent lights work just as well as growing lights when starting plants inside. Whaaaa? So you mean I don’t have to spend $20-30 for a fancy bulb? He swears that if you get a warm and a cool fluorescent light bulb and hang them very close to the seeds for 18 hours a day, then the plant will get the full spectrum of light necessary for healthy growth. You’ll know if it’s not enough because the seedlings will lean toward the light or grow tall and spindly reaching for more. So we got a couple of shop lights and some warm and cool fluorescent bulbs and the Handyman rigged us up a proper growing station in the furnace room.

img_9773

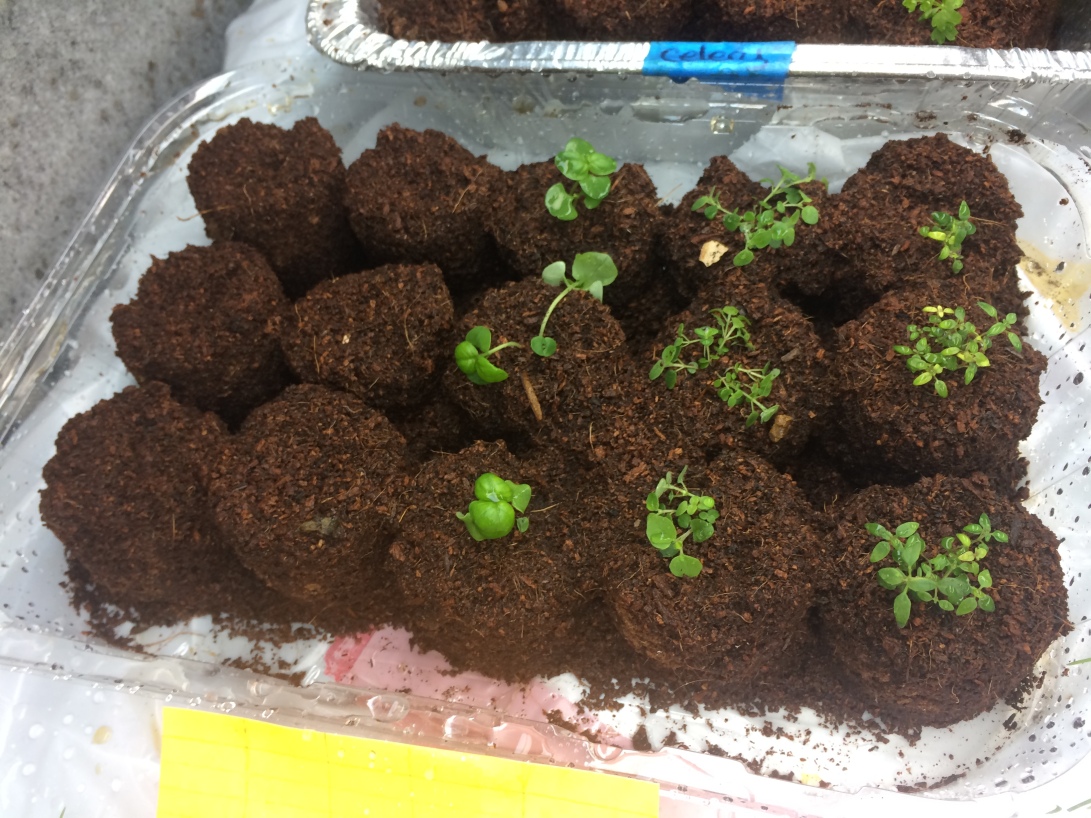
And, spoiler alert… we started some seeds a couple of weeks ago because we were really impatient and wanted to try our soil block maker. And there they are in the back right corner! They’re doing great! No one is growing all leggy and stupid or leaning hard toward the light. Here’s a close up pic.

img_9713
Aren’t the little broccolis and cabbages just precious??

I did learn a few lessons in this seed starting adventure. Firstly, I learned that the Handyman’s patience for working out the kinks of soil block making is positively correlated with the number of Yuenglings he’s had. Secondly, I learned that I should never let the Handyman do the seed labeling (might also be Yuengling-related).

img_9757

And finally, I learned that the feeling of having all of this done is so much better than I thought it would be. It was weighing on my conscience, just knowing how close spring is getting (92 days as I’m writing this!) and how many things are still on our To Do list. It feels like every time I cross something off I add two new things. Having this done takes a lot of worry away.

The next goals are to get an Ask the Experts interview with a local farm and start the chicken coop plans. I’m still trying to decide between getting pullets or chicks. There are so many decisions!

UPDATED! See how my seeds are doing now!