What Have We Learned So Far?

The Handyman and I both knew that the first year of our homestead plan would be a learning experience. Of course, I was secretly hoping that we would learn that we did everything perfectly, but no. We are learning the much more realistic “hard way”. As painful as it is to admit mistakes, I think it’s more painful to repeat them, so we are going to take a very hard look at what worked and what didn’t.

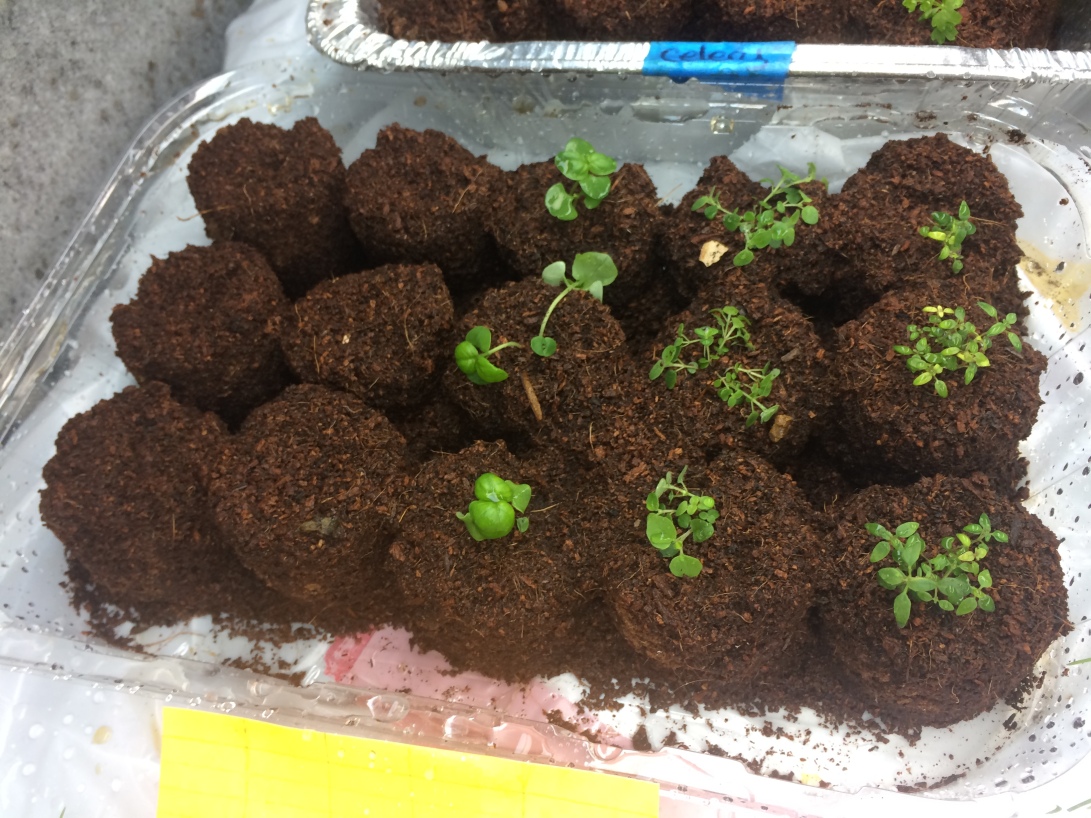
First, we will probably not start our own spring seeds again. Yes, it was cost-effective compared to buying seedlings from Home Depot, and our seed starter system was even cheaper than starting your own seeds from a kit. However, we’ve discovered a local woman who sells started seedlings for $0.25-.50 a piece. She sells varieties that she knows will thrive in our climate, and she starts everything in a greenhouse so by the time the ground is ready for planting her seedlings are nice and big. Until we get our own cold frame and/or greenhouse we just can’t beat her prices. This also gives us the opportunity to try several varieties of vegetables without increasing the total cost, unlike when buying seed packets. We will start our own seeds for fall plantings whenever possible, but I think our spring seed starting plans are on hold for a while.

We also learned that our garden is laughably small for the amount of people in our family. This fall the Handyman is expanding it by 10 feet on one side and 5-7 feet on the other. We were so concerned that it would be too much work that we erred on the small side. That turned out to not be the case. The rows that I formed were incredibly helpful for weeding the plants. Using a collinear hoe that the Handyman made and a “push-pull” tool that I bought from a local Mennonite hardware store made weeding a breeze. I barely ever had to even bend over, which was really helpful since I’m usually weeding while wearing a baby.

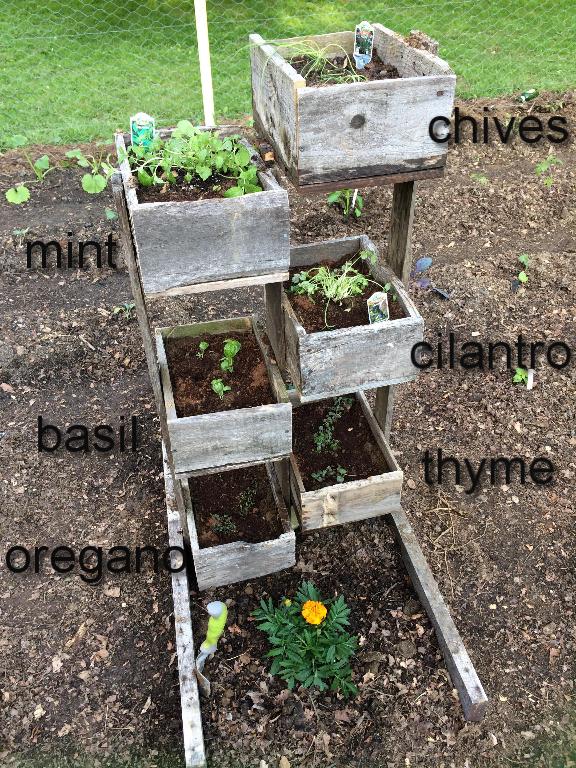
However, I did discover that while the center pathway is pretty, a perimeter path is absolutely necessary for good weed control. The only weeds I really struggled with were the ones that were creeping in from the edges. Our vining cucumber, zucchini, and tomato plants were right on the back row, and there was absolutely no room for me to get between them and the fence in order to weed. Next year the garden design will involve one perimeter path instead of a center path. The herb box will just have to find a new home somewhere else in the yard.

I learned that you have to check your zucchini plants every day. If not, then a squash that looked tiny on Tuesday will be the size of a small child by Thursday. We are going to enjoy most of our zucchini in breads this year because they’re just too big to eat any other way. And, sadly, bigger squash is not better squash. So learn from me, and keep an eye on these suckers.

zucchini

We learned that some things are not worth planting. I cringe when I think about the three garden rows that were devoted to broccoli and cabbage that were attacked by caterpillars. The loss of those crops was pretty sad, but when I think about how all that space would have only yielded six or seven broccoli heads and four cabbages I get even more sad. What were we thinking?! Now that I know how many pounds of beans or melons we could get for the same square footage I feel like an idiot. Next year we are not going to bother with them.

garden labeled
WHYYYYY did I waste so much space on broccoli?!

Earlier in the spring the Handyman and I tried to prevent the various fungal issues that were plaguing our peach tree last year. The consensus on Google was that a copper fungicide was the best way to go, so we sprayed the heck out of it it just after the flowers bloomed in very early spring. We plucked off every leaf that started to show signs of peach leaf curl, and we cut off branches that were looking sickly. When the tree was heavy with growing peaches we thought we had found success! Unfortunately, right as the peaches were ripening there was a massive mold blight and we lost every single peach on the tree in a matter of days.

I consulted a local expert, and his opinion was that we should just axe the tree and plant another one in a better location. As my expert noted, peach trees really “don’t like wet feet.” Our tree is in the lowest part of the yard, pretty much at the same level with the creek across the street. The roots are probably perpetually wet. He also mentioned that in Pennsylvania most orchards replace their peach trees after five or six years. Something about our damp summer climate just isn’t conducive to a long fruiting lifespan. We’ve been in our home for four summers, and the tree was a pretty good size when we moved in, so I bet this tree is at least seven years old. Sadly, the Handyman and I are going to say goodbye to it this autumn, once the leaves have dropped.

On a positive note, our smallest apple tree seems to have really enjoyed the pruning he got back in spring. We are full of crunchy red apples! I have a few of my favorite apple recipes coming up in the next post. Apple custard cake, anyone?

The Handyman has learned that ducks are noisy. Really really noisy. I love duck quacks. I think they are hilarious. The Handyman not so much. Our ducks are hysterical, and they love to walk around the yard, marching and quacking in unison. Every few days I refill their turtle sandbox/pond and they have a splashing contest. They are a constant source of entertainment for me. The poor Handyman gets harassed every time he goes near them because he made the mistake of feeding them, so now they expect food every time they see him. I still think he will learn to love them. Welsh Harlequins are so darn pretty; how can you not love them?

So, as the garden produces its last few crops, the egg production begins to slow down, and we do a mental tally of all of the things we learned this year I think it’s safe to say that we had a successful first year. I’ll jot down a garden summary once the final veggies are gathered and we’ll figure out if we broke even. We might have lost our broccoli, but we more than made up for that in potatoes!

Thanks for following along with us on this journey.

What’s New on the Homestead

So it’s been awhile since our last project was completed, and things have been going smoothly for the most part. We haven’t done anything major, but have stayed pretty much constantly busy. Have you ever had one of those weeks (or two or three) where you feel like you never sat down but you can’t put your finger on what exactly you have accomplished? Yeah, that was us for the last couple of weeks. It feels nice to get some of that little stuff checked off the To Do list, but it’s not quite as satisfying as completing a large project.

One of the things I have been really needing for a long time is a place to keep my aprons. They’ve been cluttering up my entry way for what seems like an eternity. I never wanted to tuck them away out of sight, because they’re used just about daily, but I also was getting pretty tired of seeing them draped over the light switch. So I asked the Handyman to hook me up with a little place to hang them. He found a scrap piece of old barn wood and I scrounged up some cool looking drawer pulls at Hobby Lobby. One of the walls of our entryway is the exposed stone from the original exterior wall of the farmhouse, so that’s not a great place to hang things. The other wall is stucco over stone, which isn’t much better, but with his hammer drill and some patience the Handyman was able to make it happen. Cost: around $4.

IMG_2455IMG_2457

I don’t like things to be too matchy-matchy, so this eclectic combination is perfect for me. The middle knob is a bit too small for my current purse, so for now it’s holding this gorgeous hand-painted hairy woodpecker sign that is painted on slate. And flanking that are my two aprons: the Roo Apron that I love, love, love, and my chicken apron. Oh guess what!! The Roo is now available in just a waist apron! It’s called … wait for it … the Joey! How adorable is that? I’ll be ordering one soon, so watch for another review post!

The chickens are doing great. They’re growing like crazy things, and eating up a storm. The chicken run is working out perfectly. They get a little morning sun in the back area, but are shaded during the hot part of the day. They love getting my kitchen scraps and the weeds I pull out of the garden. These girls can decimate a watermelon rind in about two minutes. I have also started landscaping the run a little bit, starting with some rhubarb! You can’t be a Pennsylvania resident without rhubarb plants in your yard. I will post pics of the landscaping when it’s all done.

Everything is starting to bloom here on the Homestead. I can’t believe all the flowers and baby fruits that I’m starting to see! Blueberries! It will be time to cover those soon, or we will have no blueberries and very fat birds. Honestly, I am so relieved to see that we have peaches and apples growing on our trees. It’s always scary when you have to prune so much dead or diseased wood off a tree like we did. We have been keeping a close eye on the leaves, and so far have had to remove several dozen that were showing signs of peach leaf curl. It doesn’t appear to be spreading any more, though, so that’s great news! Maybe there will actually be a post on making peach preserves this year. And it is so wonderful to see my earliest flowers starting to pop up. The miniature roses opened just this morning, and though they are small they pack a lot of color in their little blossoms.

In the next few weeks I expect to see blooms on lots more things, especially in my perennial garden. I have so many plants: bee balm, lemon balm, gooseneck loosestrife, evening primrose, firecracker vine, moonflower, hyacinth bean, false sunflower, penstemon, echinacea, rudbeckia, coral bells, black adder, mountain laurel, sarsaparilla, astilbe, lily of the valley, peony, rose of sharon, and hydrangea. I love spring! I try to keep a good assortment of native plants around because it helps the local bee population, and then something native is blooming for them all season long. I’d love to start keeping bees as part of our Homestead one day.

The vegetable garden is coming along too. The Handyman constructed a trellis for the climbing cucumbers, zucchini, and tomatoes using some scrap pipe from a plumbing job and some cord. I plan to support the vines with garden ties as they get bigger. The potato plants are popping up so fast. They really keep me on my toes, because every day I have to pile more soil on them so they are able to grow more potatoes. Next year I will trench them even deeper.

IMG_2386

It’s hard to notice any changes when you see everything daily, but comparing them side-by-side makes it so obvious how much everything is growing!

Since we planted everything we have had the foggiest, rainiest, most overcast couple of weeks that I can ever remember having. It has been downright pathetic. This poor garden has had plenty of rain, but hardly any sun. Hopefully these last few sunshiney days and the nice weekend we have forecasted will give these little guys a nice boost.

In other, sadder news: We had our first big failure. Our ducks are gone. The Handyman was mowing the lawn while they were free-ranging (NO that’s not what happened!) and it must have startled them because they took off running and we haven’t seen them since. I am distraught. We live next to a pretty decent sized creek with plenty of riparian zone for them to hide in, and every so often I swear I hear them quacking from over there, but they just won’t come home. I’ve tried banging their food container, splashing in their wading pool, and doing everything I can think of to entice them to come back. The vegetation is too thick to try and track them down and catch them. I was optimistic that they’d get hungry and come home, but I guess the creek is just too inviting. With every passing day I think the likelihood of them coming back is getting smaller and smaller. I miss them. I will update if anything changes.


400 Square Foot Vegetable Garden Layout

Lots of things need to be considered when planning a garden. Not only do you need to have adequate soil, water, and sun, but you have to plant things in just the right place. Some plants need lots of sun, but if you live in a very hot climate they can’t handle afternoon sun. Some plants need shade, but filtered shade, not complete shade. Some plants are just buttheads and need to be isolated or they’ll take over (I’m talking about you, mint). If you buy indeterminate tomatoes or vining cucumbers then not only do you have to consider how you will support them as they climb, but you also have to place them in an area where they won’t grow up and shade nearby plants. Basically, it’s not a simple process. But fortunately, it’s not an impossible process either.

This is my first time doing honest-to-goodness, in-the-ground vegetable growing. I can grow some killer peppers and tomatoes in containers, and my herbs have done alright over the years. But I’ve never done a vegetable garden where the plants go straight in the ground. The side-effect of being a renter for so many years, I guess. So I have to plan this all out from the beginning. Time to pull out the stuff I learned in all those botany classes.

We started with a garden plan borrowed from the back of Small Plot High Yield Gardening called the 400-Square-Foot Soup Garden. This garden plan has a great selection of vegetables for cooking, like beets, beans, broccoli, potatoes, celery, carrots, onions, etc. Originally we were going to follow this plan almost to a T, until we spoke to Dax at Beets Workin’ Farm. He basically warned us against spending much time and energy trying to grow celery and carrots. Ok, so we scratched those two things off the list. We also wanted to swap spinach out for lettuce, since we eat a lot more lettuce, and decided to do more lettuce instead of peas. Did I mention we eat a lot of lettuce? We also swapped out sorrel and parsley for lots of hot peppers. The Handyman loves hot sauce, and makes a few types of his own, so we wanted to make sure we had plenty of hot peppers to use. So, basically we kept the layout of the rows along with the herb garden in the center of the path, but the varieties we planted are quite different so we had to reassess where to place everything.

Beets, which are a family favorite, do extremely well when planted next to bush beans and potatoes but far away from pole beans. Cucumbers like being next to cabbage and broccoli. Eggplant likes peppers. Peppers like tomatoes. Tomatoes like peppers, but shouldn’t be next to potatoes, because they both attract the same pests. And pretty much everything in the garden benefits from having marigolds around. Marigolds repel pests, and the chickens can eat the spent blossoms to enrich the color of their egg yolks.

So, after a lot of drawing, erasing, re-drawing, crumpling, muttering, and grumbling, I finally came up with a layout that will keep things apart that need to be apart, keep things near that like to be near, keep things east that grow quite tall, and protect things that are more sensitive. My lettuce is currently set to get strong afternoon sun, but I am planning on making shade cloth tents for those three rows, so hopefully I can still grow it there.

And then we planted everything! That was the best part. I love sinking my hands in the soil.

garden labeled

box labeled

It was Mother’s Day this past weekend, and my kids knew exactly what to make for me. Garden markers! The Handyman cut them some pieces of wood, and my oldest daughter helped orchestrate a painting party for everyone to make some signs. I love homemade things, and I especially love mis-matchy things. If things look too neat and orderly I start to get a little claustrophobic. I like an eclectic look. These lovely signs are a perfect addition to our garden and a great visual representation of the unique personalities each of my kids have.


In addition to the things we started from seed, we purchased the following seedlings from our local nursery:

  • hot peppers
  • bell peppers
  • cucumbers
  • zucchini
  • eggplant
  • purple cabbage
  • lettuce
  • mint
  • chives

The reason we purchased some things instead of growing them was purely a financial decision. We knew we wanted a lot of variety in our hot peppers, so to buy 6-7 different seed packets only to grow 1-2 plants of each variety just doesn’t make sense. We also knew we only wanted one or two zucchini and eggplant plants. When seed packets are a few dollars a piece, and your local nursery sells seedlings at 50 cents a piece, the math isn’t difficult to do. I also ended up buying two purple cabbage seedlings on impulse, because I remembered how much I love the spicy addition to my salads. Finally, my mint and chive seeds never germinated. Still not sure why.

IMG_0652
Sad mint and chives are sad

One thing I was trying to avoid, too, by buying some things and starting others, was having everything ready for harvest at the exact same time. The bush beans, for example, all ripen together. So if I plant 15 bean seedlings in my garden at the same time then I will have ten thousand beans at once. However, bean seeds only have about a 70% germination rate, and a germination period of about 10-14 days. So, I plant my seeds, two weeks later I plant more where the bald spots are, and now I have naturally staggered bean plants. Same with the lettuce. I bought green leaf lettuce that can be harvested in bits or the whole head. As it matures, I will take outer leaves from some of the heads, allowing the inner leaves to keep growing and growing, and some I will head completely. Then I will replace those heads with lettuce seeds and start the process over again. This will also keep us from getting bored by letting us swap out lettuce varieties throughout the season. Haha … letting us … let us … lettuce. (Ok, I’m getting giddy, time for bed).

Here it is! The finished garden! (Well, technically the potatoes weren’t planted at the time this picture was taken, but close enough!)

A few things we learned through the seed-starting process will hopefully help us next year. First of all, we believe we need an additional grow light in the basement. We didn’t have anything get leggy or lean, but we do feel like we could have had a better arrangement downstairs if we had more light. I also didn’t thin my seedlings. It made me quite nervous to decide which seedling was going to live and which would become chicken food, and I was worried I would pick the wrong one. Then I had this wacky idea that I could just separate the seedlings right before planting and have double the plants. Well, that was stupid and I know that now. I was only successful in separating one of my seedling sets. The rest ended up getting thinned out anyway, only the plants were bigger so I felt even worse. Next year I will thin! I promise!

Another thing that will hopefully be different next year is the starting time. We were starting from scratch this year, and we had to wait for the ground to thaw enough for us to work the soil before we could do anything. Even the silage tarp couldn’t go on until we were able to take off the first layer of grass. Next year we can put cold-tolerant plants out much earlier than we could this year, because the garden will be ready. Also, we can plant garlic this fall and have garlic in the garden next spring! Lots of things can be started earlier. The Handyman wants to build us a cold frame, too, so hopefully we can extend our growing season in both directions. I am going to spend this winter doing the research to figure out how best to get two harvests out of this garden next year.


Our 20 x 20 Vegetable Garden

So a few posts back I updated you on our spring activities. The Handyman and I broke ground on our 20′ x 20′ vegetable garden and we put down a silage tarp to do several things: kill off the remaining grass, warm up the soil, and draw up the earthworms for some all-natural aeration and decomposition. The silage tarp remained on the garden plot for about a month, and boy did it work!

The grass is completely dead, there are visible holes from the worms, and it was easy to feel how much warmer the ground was just by sticking your hand into the soil. That little trick saved us a LOT of work!

Every year the Handyman takes our shredded leaves and grass clippings in the fall over to a pile in our neighbors’ field. They let us borrow their wonderful tractor with a vacuum attachment on it that just mulches and sucks those things right up. Now that they’ve been sitting for a few years getting nice and composted, we want our leaves and grass back!

I’m not a compost expert by any stretch of the imagination, but I do know that good compost is made from a mixture of brown and green vegetation. Compost from just dead leaves will be nitrogen-poor and take years to decompose. The addition of a “green” (like lawn clippings) adds nitrogen and speeds up the composting process. That said, our compost probably still could have used another year. In the future, we are going to be more conscientious about stirring it, and possibly even add another nitrogen source. I bet we’ll have plenty of chicken manure! Still, even partially decomposed leaf compost attracts worms, and worms leave worm castings, which is fertilizer gold. It can also help to hold moisture in the ground, similar to how mulch works. So even though it’s not completely composted, we decided to go ahead and dump it on and mix it with the top few inches of soil. We even got the kids to help.

We purposely only went down a few inches into the soil to not bring up buried weed seeds or disturb the natural layers of soil. Ideally we would have used a broadfork instead of using a tiller at all, but since they run around $300 we decided to go with a more economical approach this year. The Handyman has plans to construct his own broadfork in the future. Did I mention that it was raining the entire day we did this? Baby Cakes was enjoying watching the tilling from underneath the umbrella.

IMG_1714

The next step was putting up the fencing. We are using the same 6′ tall 2″ poultry netting that we used for the chicken run. Buying it in bulk really saved us some money. It will be buried in the soil about a foot out from the edge of the fence, just how we did the chicken run. It won’t keep everything out, but it will deter some of the lazier critters. We are also using some more landscape timbers instead of 4×4 posts. They are considerably cheaper, and I really prefer the rustic look that they add. We also got some free labor from Matt, one of the Handyman’s friends. He dug the holes for the landscape timbers to go in. Better him than me!

IMG_1708
Here’s Matt, hard at work digging holes.

On a note totally unrelated to the fact that Matt was drinking beer while digging, a few of the timbers are … slightly … off. Only a foot … or two. But we now have a door we could drive the tractor through, so I guess that’s a plus.

img_1731.jpg

While Matt and the Handyman were doing all the heavy lifting, I decided to go ahead and make my garden rows. Taking the advice I got from Dax, I decided to make my garden match my tools. The rows are about two feet wide, which seems to be pretty standard for a small garden like ours, and the space between rows is exactly as wide as our rake. It’s not an exact science, but I can definitely see how taking the time to match to your tools will save time and energy in the long run.

I got to see what it was like to have an audience while working. Look at all these big strong guys watching me do the work. No one is even pretending to help! I guess that’s how the Handyman usually feels, huh?

I ended up making a path down the middle, going around the pallet wood herb planter that the Handyman made me for Valentine’s Day this year, that split our eight 20′ rows into sixteen 9′ rows. The rows run north-to-south, so the sun will rise at the back of the garden, and the front will get the afternoon sun. I like this layout because it allows me to better arrange the plants so that the tall ones won’t shade the short ones. My indeterminate tomatoes will go along the back row, for example, so that they’ll get lots of sun without acting as a screen. I want to be able to control the shade my plants get, so the default is to give them all full sun. Soon I will be building shade cloth tents to protect some of the more sensitive plants from that hot afternoon sun as we progress into summer. My goal is to be able to grow lettuce all season long.

IMG_1720

So it was a lot of hard work, mostly by the Handyman, but it is finally finished! The plants we started from seed have been in the garage hardening off, getting ready to be transplanted. Mother’s Day is when my local expert tells me it’s safe to plant in the ground. I can hardly wait!

I am so excited for my finished garden. It’s funny, because the Handyman and I were so concerned that we were getting in over our heads with a 20′ x 20′ garden, but now that we see it we wish it was bigger! Luckily the Handyman thought ahead, and put it where it will be easy to expand it another 10 feet next year.

The next few projects will be planting our vegetables, running water out to the workshop and/or building a rainwater irrigation system, painting garden markers with the kids, building a duck house, and possibly another giveaway! Stay tuned!

DIY Tiered Planter Box from Pallet Wood

One of the best perks of being married to the Handyman is that I get the most amazing homemade presents! I get nightstands for my birthday, bookcases for Christmas, and birdhouses just because he loves me. All made from rescued wood! This year for Valentine’s Day he asked me what I wanted, and I requested a set of planter boxes for my herb garden.

The garden plan that we’ve chosen to use as our inspiration has an herb garden centerpiece, and I got really excited about designing one for our garden. The location of our garden is full sun, so I thought a tiered set of boxes would be the best way for me to be sure that I could grow both sun-sensitive herbs (like basil, which prefers afternoon shade) and sun-lovers (like chives) in the same area without giving up a lot of square footage. It will also help keep aggressive plants (like mint) from spreading all over the damn place. I like mojitos as much as the next person, but there are only so many I can drink.

So on an unusually warm February day, the Handyman, armed only with my request for a “tiered” system, built me the most amazing herb garden planter boxes.

He started by ripping apart some of the coolest, oldest, most deliciously weathered hardwood pallets that I’ve ever seen. These things had some serious character. He set aside the stringer boards to be used as legs, and started cutting up the slats.

As anyone who has ever worked with rescued wood can tell you, you don’t go into the project with dimensions in mind. The wood tells you how big your end result will be. Pallets aren’t any different. In this case, the six widest slats ended up being the sides of six rectangular planter boxes. The exact dimensions can be whatever you like, but the length of your pallet slat equals the perimeter (sum of all four sides) of your rectangle. A 48″ pallet slat can make a 12″ x 12″ square, a 10″ x 14″ rectangle, an 8″ x 16″ rectangle, or myriad other configurations, as long as the perimeter is 48″. Just know that the farther you get from a square, the smaller your surface area will be. 12×12 is 144 square inches, but 8×16 is only 128 and a 2×22 is only 44 square inches. If planting area is important to you, stay close to square. We decided to do slight rectangles to help with stability by spreading out the center of gravity a bit.

The little man got to help assemble the boxes.

Once the box sides were assembled, the smaller slats were cut to fit the bottom of the boxes, with slight gaps left to help with drainage.

The planter boxes are arranged in two columns of three boxes. Each set of three boxes is secured using a pallet board on the side, and the two columns are attached together using a third pallet board down the middle. You want enough height between boxes to allow for plant growth, sunlight exposure, and to let rainfall naturally water your herbs.


Also, remember that if you want your columns staggered you need to have the side supports longer on one side. A good way to avoid mistakes is to attach the pre-made boxes to the center support first, and then add the side supports.


box numbered
Side support for Boxes 1, 3, and 5 runs from the bottom of Box 1 to the top of Box 5, whereas side support for Boxes 2, 4, and 6 begins one box-height below Box 2, to elevate it above Box 1. Center support runs from the bottom of Box 1 up to the top of Box 5.

Finally the stringer boards were attached to the base to give stability. Since our boxes are going to go in the center of the garden path, the Handyman kept the stringer boards long and narrow so we won’t have to step over them as much.

The final product is perfect for our rustic, rescued wood homestead. It’s been sitting outside the Handyman’s workshop since February so those cut ends are getting nice and weathered now. As soon as the garden is completely tilled and ready this sucker is going smack dab in the middle. I can’t wait for all the tasty goodness to start growing. I’ve already got my basil, oregano, and thyme hardening off and getting ready to go outside, and today I bought some mint and chive plants, since those seeds didn’t germinate. We still have frost potential, so nothing is outside yet, but next week is Mother’s Day and my local experts tell me it’s safe then. I can hardly wait!


“My father never told me how to live; he lived, and let me watch him do it.”  Clarence Budington Kelland

Early Spring Update

Lots of projects have been underway here at the Homestead over the last several weeks. I figured it was time to update everyone on their progress.

The first thing we did was start our seeds in the basement growing room. This has had great success! We did start out with one hiccup, which is that the timer I set to turn the grow lights on and off never turned them off! It took a good two weeks to notice, too, because they were set to go off well after my bedtime. Ugh. So I was afraid things were going to get leggy and stupid, but nothing really seems to have been affected that way.

We took the advice of Dax from Beets Workin’ Farm and abandoned the celery we started. It didn’t seem like a good use of our time and space for just a 20 x 20 garden. So, forgetting about the celery, we have our herbs (thyme, basil, mint, cilantro, oregano, parsley), broccoli, cabbage, onions (yellow and red), chives, and tomatoes. And everything is growing except the mint and chives.

I’m really not sure what happened there, because the other seeds in the same seed tray (so subject to the exact same conditions) are all growing and thriving. I have heard that mint needs lots of light to germinate, but given our issue with the light timer, I don’t think that’s the problem. If anything the seeds got too much light. But since everything else is doing well, I am going to assume it was one of two things: the seeds required conditions other than what I gave them, or the seeds were duds. Luckily, the plan was for these guys to go in the handy dandy herb boxes the Handyman made me for Valentine’s Day, so I will just either try to plant seeds there directly or buy one or two plants from my favorite local garden place. I’m thrilled with the rest of the plants. I need to start trimming the onion greens back to around 3″ to make sure that the plant is growing down, not up, and I really need to thin some others out again, but overall I’m really happy with the way things are growing.

The next project we had was protecting my bird feeders from the dreaded squirrel. This was wildly successful … at first. Instead of emptying my bird feeder after only two days, I had nine glorious days of squirrel-free bird watching before the feeder had to be refilled. Then again, nine days of freedom. Until one day, while washing dishes, I looked out the window and saw this …img_0566.jpg

Just as I feared, the squirrel got a taste for the seed sauce and it stopped scaring him away. The next day the feeder was empty. I guess it’s back to Square One. I spoke with my local Wild Birds Unlimited store, and they’ve invited me down to talk to them about keeping the squirrels away. So I guess it’s time to revoke my endorsement of the seed sauce from my previous post.

The next project was the chicken coop. There’s not a lot to add to this, except to mention that the 400 square foot chicken run is being constructed as I type this! Look for a detailed post in the near future.

As far as progress on our homestead, The Handyman got the John Deere out and moved our old burn pile, sort of “breaking ground” on our new garden. How exciting!

Once that was done (including moving an ENORMOUS wood log that was buried in there) the Handyman marked out the location of the garden and used the front end loader to back drag the ground and get down to the top layer of dirt.

Finally, we got a silage tarp and covered up the patch that will soon be the garden. This will kill off the grass that the John Deere didn’t get, and also warm up the soil to draw the earthworms up to help do some decomposition and aeration for us. Thanks for the suggestion, Dax! This tarp was purchased from Do-It Best for around $16. It’s durable enough to last several years, as long as we don’t tear it. If you decide to prep your garden with a silage tarp too, just remember to get a light-blocking one. Some of them are labeled as UV blocking, but that’s not the same thing. Believe it or not, a great place to figure out what you need is any website with instructions for how to grow pot. They’ve got that down to a science!

Now we wait!

Lastly, we pruned our peach and apple trees. Unfortunately our peach tree had horrible fungus last year, so we had to prune back quite a bit. The apple trees just needed general  pruning to improve air circulation and keep the fruit-bearing branches down low where we can reach them better. Here are some before and after pictures.

IMG_0647

Other than that, it’s basically been your standard early spring in rural Pennsylvania. We got about 20″ of snow, and then two weeks later it’s 65 degrees and sunny. Little signs of life are visible around the homestead, the perennials are starting to poke up through the earth, and it’s getting even more exciting to imagine where things are going to go. This is Year Two for my perennial garden, so I’m anxiously watching the ground to see signs of things returning. So far I can see the hostas poking up, the peony shoots starting, the bee balm is coming back, there are leaf buds on the yellow barberry, the sunflowers are popping up, the St John’s Wort is getting bigger already, and all the sedum varieties are visible! I can’t wait to see my rudbeckia, echinacea, evening primrose, lavender, and purple salvia. And probably more that I forgot I even planted. It’s really an exciting time to be a gardener: that magical week when the plants are coming back but the weeds haven’t kicked in yet.

Please like and subscribe to get a notice when my latest post is published. Up soon is going to be another Ask the Expert post, the construction of our 400 square foot chicken run, and a cool product review for one of my new favorite things! I’m even trying to orchestrate a giveaway! Stay tuned.

Expert Advice

Knowledge is of two kinds. We know a subject ourselves, or we know where we can find information on it. ~ Samuel Johnson (1709-1784)

This week I had the pleasure of chatting with the owner of one of my favorite farm stands, Dax Funderburk from Beets Workin’ Farm. Dax left a high-stress job in telecommunications and started farming on his property several years ago, and is now providing enough produce for his extended family of nine, a daily farm stand, and Saturday sales at the Trexlertown Farmers Market.

market
Trexlertown Farmer’s Market- Photo courtesy of Beets Workin’ Facebook page

His darling daughters each have their own business as well, including herbs, flowers, ducks, and microgreens. He is teaching his kids to be self-sufficient and entrepreneurial too. These are valuable lessons for everyone, but especially young girls.

His operation started on a 40′ x 40′ raised bed garden. He has since expanded to just under 44,000 square feet of garden, spread out over several large plots. The 40′ x 40′ garden still gets use, as each of his daughters must first prove their ability to manage that space before they can expand into the yard. Here I am, just hoping to be able to handle 20′ x 20′ with the help of my four oldest children, and the Funderburk kids can do 4x that size all by themselves. Of course, it helps when Dad has a wealth of information, experience, and tools.

One thing I’ve noticed about farmers and gardeners is their enormous generosity when it comes to their expertise, and Dax is no exception. I picked his brain for the better part of an hour, got a full tour of his farm, and even asked follow-up questions for days. He has the patience of Job.

So what is the advice that he has for the novice vegetable gardener?

  • Evaluate your space and avoid crops that take up a lot of space or take a long time to mature
  • Avoid complicated crops the first year (bye bye celery and carrots)
  • Plan your garden rows to match the size of your tools, not the back of a seed packet (this is GENIUS)
  • Plant enough for the rabbits too, because they’re going to get some
  • Put a fan on your seedlings to reduce the chance of mold/mildew and encourage the development of resilient stems
  • Seedlings aren’t nearly as delicate as many sources would have you believe, so don’t be afraid to touch them a little or let them lean toward the light
  • Use a hydrogen peroxide solution spray to eliminate any mold that pops up
  • Use a silage tarp (a light-blocking tarp) to prep the garden by warming the soil, killing off the grass, and encouraging the earthworms to the surface to help break it down
  • DON’T TILL YOUR SOIL- this will just pull weed seeds up to the surface and blend the natural layers of the soil. Instead, use a broadfork (like a very wide pitchfork) to aerate the soil to encourage decomposition without destroying the balance
  • It’s all about having the right tools for the job: broadfork, collinear hoe, German push hoe, etc.
  • Don’t weed, cultivate- weeding is only hard if you let the weeds go until they need to be pulled.
  • Only walk in between your garden rows. You worked hard to get the soil aerated, and you don’t want to compress it back down

So much of that information seems like common sense when you hear it, but for a beginner it’s not something you necessarily think of. I was sticking very dutifully to the requirements on the back of my seed packets, not realizing that I was possibly creating a garden that would be nearly impossible to keep completely tidy. Make your space fit your tools and the work is easier. Brilliant in its simplicity.

The broadfork was really an amazing piece of advice. Watching Dax demonstrate its use really showcased the way you can use your body weight as leverage to get down deep in the soil to encourage aeration without stirring it like you would with a tiller. In our area we have a lot of clay in our soil, so this can help prevent it from becoming a hard, unworkable mass. I will definitely have to put this on my wish list.

Dax and his family are also experienced chicken keepers, so I “pecked” his brain about that too!

  • What chickens need is pasture space, and will be fine with little coop space if they have access to a large outdoor area during the day
  • Black chickens will be less prone to aerial attacks by hawks because they resemble crows, the natural enemy of hawks
  • Some chickens are just jerks and will not make very good large flock birds (I’m talking about you, Americaunas)
  • Don’t put perches too close to the nesting boxes because the hens will peck at the ones laying eggs, and then all hell breaks loose
  • If you choose to use supplemental lighting, increase the light in the morning, but let the chickens experience natural sunset so they can get to their roosts and not have the lights shut off on them suddenly
  • If you supplement light, give them a break between Christmas and Valentine’s Day so they can relax, molt, and experience the reduced daylight hours
  • By the time you can smell ammonia, it’s too strong for the chickens, they are stressed, and egg production will go down
  • To improve coop air circulation, put a ventilation spot down low on the side of your coop that gets the predominant wind, and up high on the opposite side. Open them to let the fresh air come in low and push the ammonia and other respiratory irritants up and out the opposite side
  • Chickens can handle a LOT of cold by filling their feather spaces with air for insulation, but they can’t do this in the wind, so keep the drafts away and the chickens will be fine

I was ecstatic to see that Dax also uses fluorescent bulbs for his grow lights, because I was a little bit skeptical when I read about that in the Mini Farming Bible. It’s good to see it in practice, and on such a high-yield farm. Check out his seedlings!


I was really fascinated by the anecdote about the black chickens being less prone to aerial attacks. Dax said his flock of Barred Rocks went from 90 to 30 in just a few months thanks to the hawks. Since he started raising Black Australorps several years ago he has only lost one! It makes a lot of sense, yet hasn’t made it into any chicken-keeping book or blog I’ve ever read. This is the wonderful part of getting a local expert to answer questions.

When I finished my Q&A with Dax, the Handyman said to me, “Ok so what have we screwed up already?” I was excited to tell him that we barely screwed up at all! Basically, we wasted some time on planting celery seeds that probably won’t go in the ground now, and we have to adjust the layout for the coop ventilation, but that’s about it! A lot of plans are going to be revisited now, including the layout of the garden, but nothing was done but planning, so I don’t really count that as a screw up. Not bad for a pair of beginners! Now the Handyman and I are going to sit down with our newfound wisdom and crank out the last of our garden plans. Stay tuned!

If you all enjoyed the information from Beets Workin’, like them on Facebook, visit them at the market, or go shop at their farmstand on Smith Street in Longswamp Township, right by the Longswamp Bed and Breakfast. If you go, let me know in the comments. I’m thinking about doing a giveaway!


Starting Seeds Inside

So last night the Handyman and I put our new DIY Soil Block Maker to the test.

My last frost date is in mid to late April, so I needed to get some seeds started indoors. According to Brett Markham, author of The Mini-Farming Bible, some spring seedlings can be started indoors as early as 12 weeks before the last frost. This is good for cold-hardy plants like broccoli. Some only need about two weeks inside before going outside, so obviously we aren’t starting those yet. Sorry, watermelon, you’ll have to wait.

Round One consists of the following plants: img_9336

  • broccoli
  • cabbage
  • celery
  • yellow onions
  • red onions
  • chives
  • tomatoes
  • herbs
    • basil
    • mint
    • thyme
    • cilantro
    • oregano
    • parsley

I’ve mentioned before that I love the book Small- Plot, High-Yield Gardening. Well, this book has one of the best things for someone starting out: A complete garden plan for just about any size garden you could possibly want. There are a lot of things to consider when planning a garden. Did you know that some plants really don’t like to be neighbors? For example, planting onions near beans will actually stunt the growth of the beans (Burpee). And some plants provide protection for others, like garlic, which is pretty much your garden’s personal bodyguard. But honestly, the list of dos and don’ts is kind of overwhelming, especially for someone who is trying to flesh out other plans as well. I just want someone to give me a diagram of what I should plant and where I should plant it. Next year I’ll think about what I loved and what I hated and adjust accordingly. Well, that’s exactly what I found in the back of Small-Plot, High-Yield Gardening.

The Handyman and I figure we are going to aim for a 20’x20′ garden. We have the space, and when we do something we don’t mess around. However, we reserve the right to scale it back if we find it too intense for Year One. We did make a couple of minor changes to the plants within the garden, but we are essentially following the layout for the 400-Square-Foot Soup Garden found on page 231. Once we’ve started all our seeds and made those final decisions I will post a diagram of exactly what we’re planting. I can promise one thing, though… it will contain a lot of hot peppers. The Handyman is capable of making hot sauce that will burn your eyebrows off if you get too close.

Just to give you an idea of scale, however, for just the plants we are starting in Round One of seed starting indoors we have to do 236 soil blocks! So, we got to test out our soil block maker and really get the technique honed in.

First of all, we are using coconut hulls as seed starting medium. If you’d like to know why, check out my post on the DIY Soil Block Maker. Burpee makes a lovely compressed brick of organic coconut hulls for just under $3, and it’s available at Home Depot. We bought several with our spare change. Basically, you take this brick, put it in a bucket, add water, wait for it to expand, and then form the hulls into whatever shape you want. It expands to 8 liters, and we found that we were able to get about 70-80 blocks from one brick. For our seed starting project all we used was the coconut hulls, a large bucket we got from a friend’s restaurant, a small bucket for spillover, water, some leftover trays we never used from a barbecue last summer, and the block maker. Now, in case anyone is wondering…. yes, this is my kitchen island. And no, I don’t recommend that anyone use their kitchen islands for this project. Ever. Learn from my fail. This was after making the five you see pictured. Imagine what my kitchen looked like after over 200!

img_9746
Friends don’t let friends destroy their butcher block counter. For the love of gardening, please use a picnic table or at least put down a tablecloth.

Here is a short video demonstration of me using the soil block maker. I don’t have fancy camera equipment, but it should suffice.

Here are additional tips as well as the written tips for anyone who can’t access the video.

  • The directions call for 4 1/2 quarts of water.  We found that 4 1/4 quarts was just perfect. Too much water and the medium is soggy, too little and the blocks don’t hold their shape. The key is to add 4 quarts of water, let the brick expand, mix it thoroughly, drizzle the remaining cup of water around and thoroughly mix again, breaking up any clumps.
  • Hand fill the block maker with planting medium. Don’t pack it full. Imagine you’re filling a measuring cup with flour.
  • When pressing down on the plunger, don’t smash the heck out of it. It doesn’t take your whole weight to compress, and you don’t want to make the soil too dense for early roots to penetrate.
  • Don’t forget that when you pull up the PVC you don’t have any support on the block anymore, so stop pushing on the plunger before you pull up on the PVC.
  • The plastic disk really needs to go past the bottom of the PVC, so if it’s indented then you need to adjust the location of the disk on the carriage bolt (see pic below)


Now that we have blocks made, we have to add the seeds. I added three seeds per block, and I will thin them out later, once I can identify the single seedling that is the strongest of the three. According to Small-Plot, High-Yield Gardening, one of the biggest mistakes people make when starting seeds is burying them too deep or covering them too hard. They only need to be covered with a sprinkling of dirt equivalent to 3x the size of the seed. Look at the size of these mint seeds! They need a few crumbs of dirt on them, and that’s it.

img_9609

Here is an example of a soil block that has been planted with onion seeds and one that has not. See how loose the soil is covering the seeds? We don’t want the plant to have to work too hard before it gets those first leaves up and starts photosynthesizing.

planted


So, as I mentioned before in my shopping post, plants need growing medium, warmth, moisture, and light. Our seeds are going in the furnace room in my basement. It’s around 70-75 degrees in there. That’s perfect for new seeds. We put the blocks in repurposed trays that are water-tight, and we will mist them until the first leaves appear and then water from the bottom to help establish healthy roots. No spoiled plants here.

Now here’s the interesting thing I discovered. According to Brett Markham’s Mini-Farming Bible, fluorescent lights work just as well as growing lights when starting plants inside. Whaaaa? So you mean I don’t have to spend $20-30 for a fancy bulb? He swears that if you get a warm and a cool fluorescent light bulb and hang them very close to the seeds for 18 hours a day, then the plant will get the full spectrum of light necessary for healthy growth. You’ll know if it’s not enough because the seedlings will lean toward the light or grow tall and spindly reaching for more. So we got a couple of shop lights and some warm and cool fluorescent bulbs and the Handyman rigged us up a proper growing station in the furnace room.

img_9773

And, spoiler alert… we started some seeds a couple of weeks ago because we were really impatient and wanted to try our soil block maker. And there they are in the back right corner! They’re doing great! No one is growing all leggy and stupid or leaning hard toward the light. Here’s a close up pic.

img_9713
Aren’t the little broccolis and cabbages just precious??

I did learn a few lessons in this seed starting adventure. Firstly, I learned that the Handyman’s patience for working out the kinks of soil block making is positively correlated with the number of Yuenglings he’s had. Secondly, I learned that I should never let the Handyman do the seed labeling (might also be Yuengling-related).

img_9757

And finally, I learned that the feeling of having all of this done is so much better than I thought it would be. It was weighing on my conscience, just knowing how close spring is getting (92 days as I’m writing this!) and how many things are still on our To Do list. It feels like every time I cross something off I add two new things. Having this done takes a lot of worry away.

The next goals are to get an Ask the Experts interview with a local farm and start the chicken coop plans. I’m still trying to decide between getting pullets or chicks. There are so many decisions!

UPDATED! See how my seeds are doing now!

DIY Compressed Soil Block Maker

One of the things you see a lot in the garden center of the hardware store are little “seed starting kits” that come with disks of expanding peat moss and little customized plastic trays. These are charming, and hold lots of promise for the imaginative beginning gardener, but there’s a reason why gardening books don’t write “Step One: Buy a billion pre-made peat moss seed starting kits.” The obvious reason is that they are expensive! Right now Amazon has a 50-plant starter kit made by Jiffy for just under $11. That’s $0.22 per seedling. That doesn’t sound like a lot, but to put it in perspective, the Handyman and I are starting a little under 300 seedlings inside just for Round One. That’s $66.00! For dirt! I just think that’s ridiculous. The kits are a great thing for children, or people who are starting one or two plants, but for anyone who is beginning a serious garden it just doesn’t make financial sense.

The less obvious reason, thanks in part to the creative photography and marketing departments that design the packaging, is that they actually make more work for you in that they are so small you will be forced to transplant the seedlings at least once before you can put them in the ground. I know the photos on the box show big healthy tomato plants, but those are not going to happen if you keep seedlings in a 1″ x 1″ peat disk.

block-size-comparison

Transplanting opens up the opportunity to damage delicate root structures. And where are you going to put the seedlings? Well, Jiffy conveniently also sells 3” peat pots for $22 per hundred. Ok, so now my cost is $0.44 per seedling, or $112 total, PLUS the cost of potting soil to fill the peat pots. I’m also out the time it takes to transplant 300 seedlings into peat pots. And don’t believe the line they try to feed you about the peat pots being planted directly in the soil and decomposing. When tilling my soil for my perennial garden last year I found peat pots, IN TACT, from my home’s previous owner. That makes them at least three years old.

Brett Markham, author of The Mini-Farming Bible, recommends using a soil-block method to plant seeds directly into a compressed block of seed starting medium that is large enough to get them all the way through to transplanting. You can buy pre-made blocks of this seed starting medium, or even buy soil block makers, but the Handyman is around, so why should I buy what he can make?

So, instead of spending $112 on dirt, we decided to make homemade soil blocks.

Now, seeds are pretty amazing. Contained within the seed are all the nutrients the plant needs for the first couple of weeks of life. There is no need to buy fertilized potting soil. In fact, delicate seedlings are more likely to be burned by the excess nutrients than they are to be helped. The seed provides the nutrients needed to germinate and push up the first set of leaves, known as cotyledons. Have you ever split a peanut in half? That little nub that you can see on one of the halves is the beginning of a set of cotyledons! Then, those primary leaves can convert light energy into chemical energy by performing photosynthesis, which provides another boost of energy. In fact, it isn’t for the first few weeks that seedlings even need additional nutrients. What they need is good light, a microbe and germ-free environment, and plenty of fluffy soil to let them establish strong roots.

For these reasons, we’ve decided to start our seeds in medium made from coconut hulls, and supplement with an organic fertilizer and compost after a few weeks. For just under $3 we were able to get a brick of organic seed-starting medium that made 36 of our homemade blocks. That’s $0.08 a piece with no need to transplant before they go directly in the ground! Time AND money saved!

A soil block maker is essentially a thingamajig that holds the coconut hulls in place with a plunger to press it into a compact shape. It is possible to buy a soil block maker for around $20-30, but given our decision to buy as little as possible, the Handyman figured he could make one using scraps from the workshop. He found a fantastic YouTube video from Homesteadonomics with directions on making a PVC pipe soil block maker and set to work.

(Now, please please please don’t take this list down to the hardware store and buy what you don’t have. If you have 6″ bolts, use those. Wrong size PVC pipe? Who cares? I won’t tell the plants if you don’t. Just use what you have laying around.)

Materials and Tools:

  • 2″ PVC pipe scraps about 3′ long
  • 2 1/4″ hole saw
  • scrap 1×4 (3/4″ thickness) pressure treated lumber
  • 8″ carriage bolts cut to size
  • nut to fit the carriage bolt
  • plastic (we used the lid of an old 5 gallon bucket)
  • wood screws
block-maker-3
From left to right: Two circles of wood cut from 3/4″ thick pressure treated lumber, carriage bolt, appropriate nut, plastic disk cut from old paint bucket lid, 6″ section of 2″ PVC pipe, drill, drywall screws, and a hole saw to cut the disks (this should be adjusted to fit tightly within the PVC, so if you get a different size pipe make sure you adjust the size of the hole saw).

Please check out my post on starting seeds inside to get a good look at this soil block maker in action. It really is brilliant in its simplicity. It forms perfect cylinders of seed starting medium, complete with a little indent in the top for the seeds to go.

Assembly is so easy. Just thread the bolt through both wood disks, use one wood disk to make a handle for the plunger and screw the other one into the top of the PVC pipe to act as a stop. The plastic disk gets attached to the bottom of the bolt with nuts so that it goes up and down with the plunger. The bottom bolt (identified in the picture on the right) is what makes the indent for the seeds.

We’re starting our seeds today, so check back in for updates later.